CM-T3x: WinCE: PowerVR Support
This document explains how to set up the PowerVR for the CM-T3x.
Adding the PowerVR driver to the image
- Download the driver from: PowerVR
- Unzip the downloaded archive and to \WINCE600\PUBLIC (to create two subdirectories - PowerVR and PowerVR-SDK).
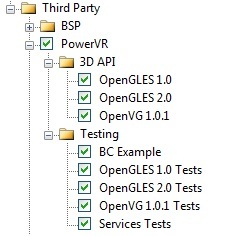
- The PowerVR ... should appear in the "Catalog Items View".
- Edit \WINCE600\PUBLIC\PowerVR\cebasecesysgen.bat (at about line 44) to "if /i not "%_TGTPROJ%"=="CM_T35_CE6" goto :SrcBld_3430"
Compiling the demo applications
The test applications source code is located in \WINCE600\PUBLIC\PowerVR-SDK.
Select “Open release Directory in Build Window” from the workspace Build Menu.
Set the SDKROOT to the type of demos/tutorials you want to build (e.g. set SDKROOT=%_WINCEROOT%\PUBLIC\PowerVR-SDK\xxxx where xxxx is OGLES1.1 OGLES2 OVG).
cd !SDKROOT!\<Demos or TrainingCourse>\<specific demo or training folder>\xxxx (where xxxx is OGLES1.1 OGLES2 OVG)
build -c
Working with PowerVR
The tutorials located in \PUBLIC\PowerVR-SDK\xxxx\TrainingCourse (where xxxx is OGLES1.1 OGLES2 OVG) provide a good reference.
Review and read the comments in the files, these comments supply a good base for not only creating new code but also for studying the API.
