Image installation
Installation with LiveDisk
- Extract the contents of LiveDisk.zip from Linux package for EM-X270 onto USB flash drive formatted with FAT filesystem.
- Insert the flash drive into "USB-A to mini-USB" adaptor supplied with EvalKit, and connect the other side of the adaptor to EM-X270.
- Power up the EM-X270 while holding the "suspend/resume" button. You may release the button as soon as you see CompuLab logo on the LCD screen.
- Wait until systems starts. You will be asked to calibrate the touchscreen and create a user to log in to the system
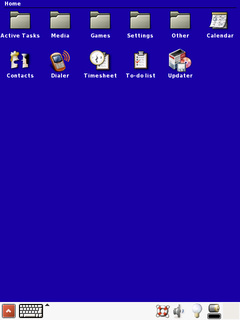
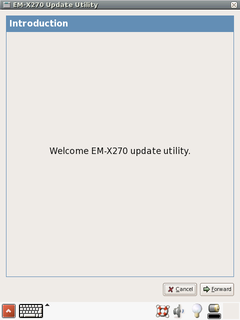
- Click on the Updater icon. EM-X270 updater application will start.

- Click Forward to continue, or Cancel if you decided to abandon the installation

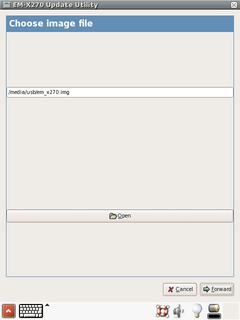
- By default, updater application will search for /media/usb/em_x270.img image file. Press Open or fill the filename entry to choose another image.
- After you've chosen the image, press Forward.

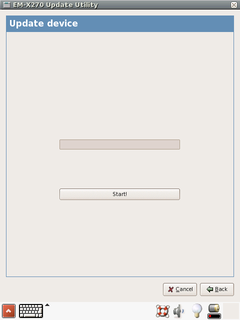
- Press Start! button to update EM-X270.


|
Make sure you do not interrupt the updater application after pressing Start!, keep the USB flash drive inserted and the device powered up during the update process.
|

|
Any time you would like to boot clean system from the USB flash drive, you can unpack the original LiveDisk.zip to the USB flash drive and start over.
|
Installation using NFS
- Follow the steps in Networked Root Filesystem Guide
- Make sure to power off the EM-X270
- Connect EM-X270's ETH0 port to your local Ethernet
- Connect your host PC to the EM-X270 via a null modem cable supplied with the Eval Kit.
- Start terminal emulation software on your PC using the COM port to which the null modem is connected and configure it as described in EM-X270's U-Boot documentation.
- Power up the EM-X270. U-Boot will start and you will get the command prompt in your terminal program.

|
If the boot settings of your EM-X270 are set to load the operating system, you may need to press and hold ^C while turning the EM-X270 on, in order to get command prompt.
|
- You can use U-boot dhcp command to obtain IP address or manually set ipaddr and serverip environment variables:
> setenv serverip <host ip address>
> setenv ipaddr <EM-X270 ip address>
> saveenv
- Next environment settings are passed to Linux Kernel and are needed for NFS root:
> setenv bootargs "root=/dev/nfs nfsroot=<your host ip>:/path/to/rootfs console=ttyS0,115200 ip=dhcp"

|
If boot_mode environment variable is set to linux or wince, then it should be changed to install and bootcmd variable should be unset, so U-Boot will not override the bootargs variable.
|
- Use the following U-boot command to boot Linux on EM-X270:
> tftp a0100000 uImage && bootm
- After the image is loaded you will get Linux login prompt. Login as root into the system.
- Copy the kernel and Angstrom jffs2 files from em_x270.img (ext2 image inside LiveDisk.zip) to USB stick or NFS share, so you can access them from EM-X270.
- Now you can install kernel and filesystem images to the NAND flash either from USB stick or NFS share using standart Linux MTD utilities (flash_eraseall, nandwrite).
- Proceed to After installation and restart section.
After installation and restart
- After the installation proccess completed successfully, U-Boot on EM-X270 needs the following environment variables set prior to booting from NAND flash:
> setenv boot_angstrom "setenv bootargs root=/dev/mtdblock5 rw rootfstype=jffs2 console=ttyS0,115200; fsload a0100000 uImage && bootm;"
> setenv boot_mode linux
> setenv nand_mode on
> saveenv
- Now you can reset the EM-X270 and it will boot Angstrom Linux from the internal NAND flash. Note, that the first boot takes relatively much time because Angstrom Linux performs a lot of one-time initialization tasks.
See also


