MCM-iMX8PV2: Evaluation Kit: Getting Started
Revision as of 15:23, 8 November 2026 by Igor (talk | contribs) (Created page with "frameless|1520px|top|link= == System setup == MCM-iMX8PV2 evaluation kit is preloaded with MCM-iMX8PV2 Yocto Linux image. # Mak...")
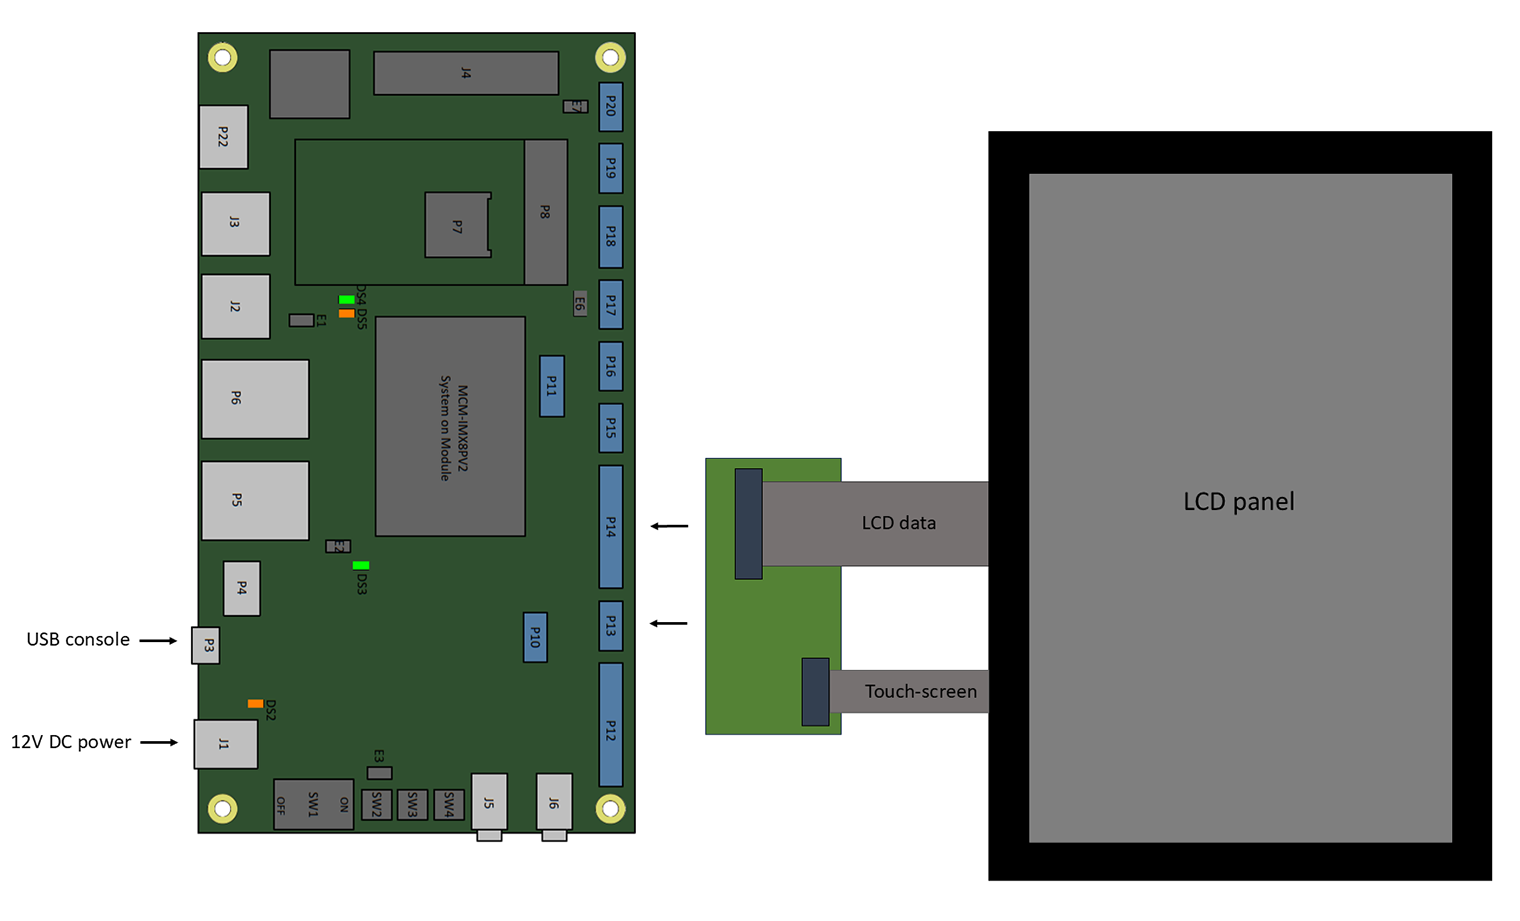
System setup
MCM-iMX8PV2 evaluation kit is preloaded with MCM-iMX8PV2 Yocto Linux image.
- Make sure jumper E3 is removed (default state).
- Make sure that the main power switch SW1 is in the OFF position.
- For kits ordered with LCD panel: use the EB-HDRLVDS adapter to connect the LCD panel (if ordered with the kit) to connectors P13 and P14.
- Connect a standard USB cable (included in the kit) between your host PC and the evaluation kit micro-USB2.0 connector P3.
- On your computer, start a terminal emulation program (such as HyperTerminal) with the following serial port settings:
Baud Rate Data Bits Stop Bits Parity Flow Control 115200 8 1 none none
Starting the system
- Connect the DC 12V power supply adapter (included in the kit) to main DC power connector J1.
- Toggle the main power switch SW1 to ON position.
- Follow the messages in your terminal emulator program until you see the linux shell command line prompt.
- Use the superuser credentials to log in:
- user: root
- pass: no password
- user: root

|
In case of no messages appear in your terminal emulation program, please refer to the detailed USB console guide. |

