Difference between revisions of "WEC7: Application Development"
| Line 19: | Line 19: | ||
:– you will use the new instance of Visual Studio 2008 to write and deploy your application. | :– you will use the new instance of Visual Studio 2008 to write and deploy your application. | ||
* Within Visual Studio 2008 select {{MenuEntry|File->New->Project}} | * Within Visual Studio 2008 select {{MenuEntry|File->New->Project}} | ||
| − | : [[ | + | : [[Image:OpenNewProjectScreenVS2008.jpg]] |
* Select Project type: Other Languages | Visual C# | Smart Device | * Select Project type: Other Languages | Visual C# | Smart Device | ||
* Choose Smart Device Project | * Choose Smart Device Project | ||
* Click OK to create the Smart Device application | * Click OK to create the Smart Device application | ||
| − | : [[image:NewCSharpProjectVS2008. | + | : [[image:NewCSharpProjectVS2008.jpg]] |
* To develop an application choose Device Application and select the appropriate Target Platform. | * To develop an application choose Device Application and select the appropriate Target Platform. | ||
| − | : [[image:NewCSharpProject2VS2008. | + | : [[image:NewCSharpProject2VS2008.jpg]] |
* You are now ready to add controls and functionality to your form. | * You are now ready to add controls and functionality to your form. | ||
| Line 46: | Line 46: | ||
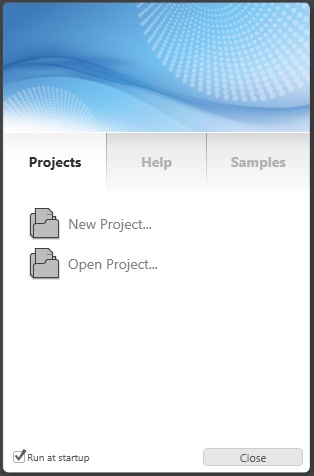
<li> Run Expression Blend 3.</li> | <li> Run Expression Blend 3.</li> | ||
<li> A menu will popup, select new project. | <li> A menu will popup, select new project. | ||
| − | :- [[image:ExpressionBlendNewProjectVS2008. | + | :- [[image:ExpressionBlendNewProjectVS2008.jpg]]</li> |
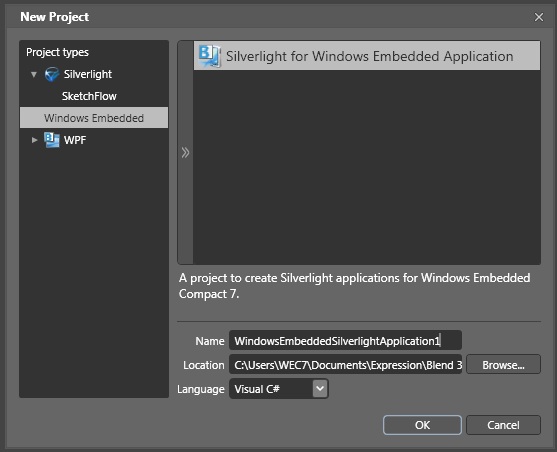
<li> Select a Silverlight for Windows Embedded Application | <li> Select a Silverlight for Windows Embedded Application | ||
| − | :- [[image:ExpressionBlendEmbeddedProjVS2008. | + | :- [[image:ExpressionBlendEmbeddedProjVS2008.jpg]]</li> |
<li> Create content and save the Expression Blend project.</li> | <li> Create content and save the Expression Blend project.</li> | ||
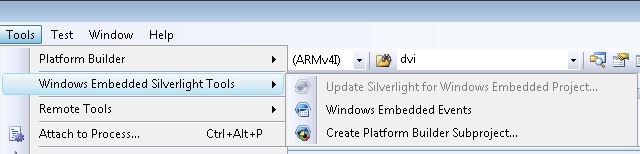
<li> Start VS 2008 and select {{MenuEntry|Tools->Windows Embedded Silverlight Tools->Create Platform Builder Subproject..}} menu option. | <li> Start VS 2008 and select {{MenuEntry|Tools->Windows Embedded Silverlight Tools->Create Platform Builder Subproject..}} menu option. | ||
| − | :- [[image:WEC7_Silverlight_subproject. | + | :- [[image:WEC7_Silverlight_subproject.jpg]]</li> |
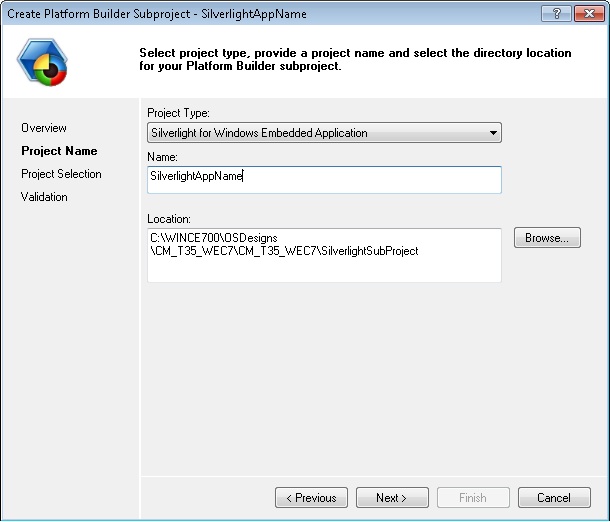
<li> Name the application and select a location for the converted subproject and press Next. | <li> Name the application and select a location for the converted subproject and press Next. | ||
| − | :- [[image:WEC7_Silverlight_subproject_2. | + | :- [[image:WEC7_Silverlight_subproject_2.jpg]]</li> |
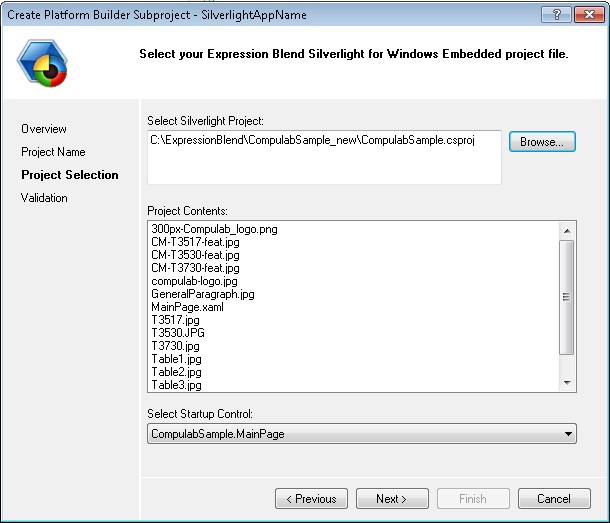
<li> Select the .csproj created originally by the Expression Blend and press Next. | <li> Select the .csproj created originally by the Expression Blend and press Next. | ||
| − | :- [[image:WEC7_Silverlight_subproject_3. | + | :- [[image:WEC7_Silverlight_subproject_3.jpg]]</li> |
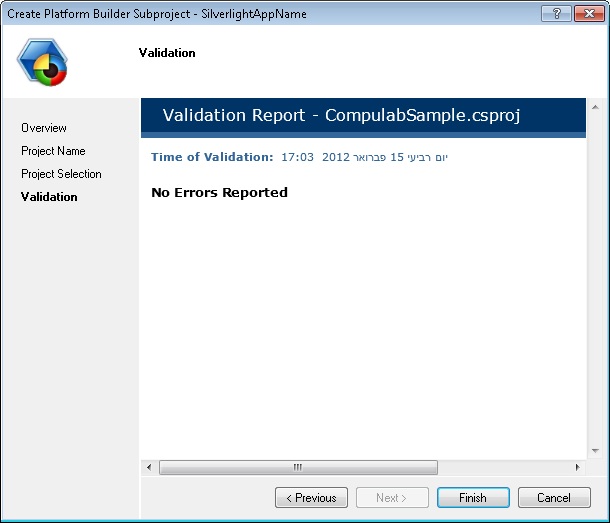
<li> No errors window should appear, which means your project has been converted successfully. | <li> No errors window should appear, which means your project has been converted successfully. | ||
| − | :- [[image:WEC7_Silverlight_subproject_4. | + | :- [[image:WEC7_Silverlight_subproject_4.jpg]]</li> |
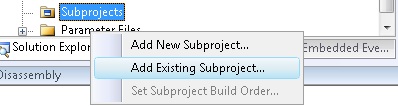
<li> Go to the Solution Explorer, right click the Subprojects and select Add Existing Subproject.. | <li> Go to the Solution Explorer, right click the Subprojects and select Add Existing Subproject.. | ||
| − | :- [[image:SubprojectsContextMenuAddExistingSub. | + | :- [[image:SubprojectsContextMenuAddExistingSub.jpg]]</li> |
<li> Browse to the converted subproject you set four stages ago, select the sources file and press open. | <li> Browse to the converted subproject you set four stages ago, select the sources file and press open. | ||
</ol> | </ol> | ||
| Line 77: | Line 77: | ||
:– you will use the new instance of Visual Studio 2008 to write and deploy your application. | :– you will use the new instance of Visual Studio 2008 to write and deploy your application. | ||
* Within Visual Studio 2008 select {{MenuEntry|File->New->Project}} | * Within Visual Studio 2008 select {{MenuEntry|File->New->Project}} | ||
| − | :[[image:OpenNewProjectScreenVS2008. | + | :[[image:OpenNewProjectScreenVS2008.jpg]] |
* Select Project type: Visual C++ | Smart Device | * Select Project type: Visual C++ | Smart Device | ||
| − | :[[image:NewProjectMFCVS2008. | + | :[[image:NewProjectMFCVS2008.jpg]] |
* Change the Project name to MFCApp | * Change the Project name to MFCApp | ||
* Click OK to create the Smart Device application. | * Click OK to create the Smart Device application. | ||
The MFC application wizard requires that you provide information about the application you want to build, this includes the platform you want to build for, whether the application is Doc/View based etc… | The MFC application wizard requires that you provide information about the application you want to build, this includes the platform you want to build for, whether the application is Doc/View based etc… | ||
| − | :[[image:prjectWizardVS20081. | + | :[[image:prjectWizardVS20081.jpg]] |
{{Note|The default settings are to build an application for Windows Mobile 5.0 Pocket PC as a single document interface (SDI) application}} | {{Note|The default settings are to build an application for Windows Mobile 5.0 Pocket PC as a single document interface (SDI) application}} | ||
* Select the Platforms option on the left side of the wizard or press {{filename|Next}} | * Select the Platforms option on the left side of the wizard or press {{filename|Next}} | ||
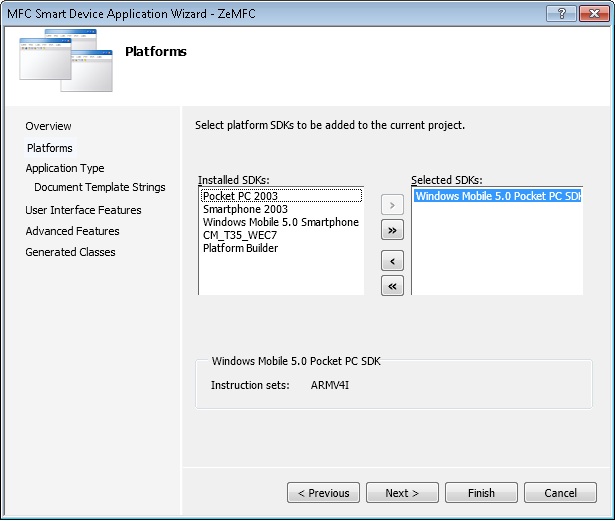
:- The {{Filename|Platforms}} page of the wizard allows you to select which platform (SDK) the application will be built against | :- The {{Filename|Platforms}} page of the wizard allows you to select which platform (SDK) the application will be built against | ||
:– The default option is to build for Windows Mobile 5.0 Pocket PC, you will need to remove Windows Mobile 5.0 Pocket PC and add the SDK you installed in the first step | :– The default option is to build for Windows Mobile 5.0 Pocket PC, you will need to remove Windows Mobile 5.0 Pocket PC and add the SDK you installed in the first step | ||
| − | : [[image:ProjectWizardPlatformVS2008. | + | : [[image:ProjectWizardPlatformVS2008.jpg]] |
* Select Windows Mobile 5.0 Pocket PC in the list of Selected SDKs | * Select Windows Mobile 5.0 Pocket PC in the list of Selected SDKs | ||
* Click the [[image:WizardRemoveArrow.jpg]] button to move Windows Mobile 5.0 Pocket PC out of the Selected SDKs list | * Click the [[image:WizardRemoveArrow.jpg]] button to move Windows Mobile 5.0 Pocket PC out of the Selected SDKs list | ||
* Select the desired SDK from the list of Installed SDKs | * Select the desired SDK from the list of Installed SDKs | ||
* Click the [[image:WizardAddArrow.jpg]] button to move the CM_T35_WEC7 into the selected SDKs list | * Click the [[image:WizardAddArrow.jpg]] button to move the CM_T35_WEC7 into the selected SDKs list | ||
| − | : [[image:ProjectWizardPlatformWithSelectedSDKVS2008. | + | : [[image:ProjectWizardPlatformWithSelectedSDKVS2008.jpg]] |
Now that the Platform has been configured you can review/set some of the application specific options: | Now that the Platform has been configured you can review/set some of the application specific options: | ||
Latest revision as of 15:24, 14 February 2013
Contents
Installing the SDK
Windows CE application development with Visual Studio 2008 (VS2008) requires installation of device-specific SDK supplied by CompuLab. To install the SDK follow the below procedure:
- Run the <Platform name>_SDK.msi file – this will install the SDK into the Add/Remove programs within control panel and also make the platform available to Visual Studio 2008.
- On the first page of the SDK installer – Click Next
- On the second page of the SDK installer – Accept the EULA and Click Next
- On the third page (customer information) of the SDK Installer – Click Next
- On the fourth page (setup type) of the SDK Installer – Click Complete
- On the fifth page (destination folders) of the SDK Installer – Click Next
- On the Final page of the SDK installer – Click Install
- To complete the installation of the SDK – Click Finish
| The SDK installer is a wizard based installer, you can click through the default settings to install the SDK |
Creating an Application
To Deploy an application to the device an ActiveSync connection is necessary between the device and the desktop machine.
C# Application (VS2008)
- Start a new instance of Visual Studio 2008
- – you will use the new instance of Visual Studio 2008 to write and deploy your application.
- Within Visual Studio 2008 select File->New->Project

- Select Project type: Other Languages | Visual C# | Smart Device
- Choose Smart Device Project
- Click OK to create the Smart Device application

- To develop an application choose Device Application and select the appropriate Target Platform.

- You are now ready to add controls and functionality to your form.
| Applications developed using VS2005 target the .Net Compact-Framework 2.0
To target .Net Compact-Framework 3.5 develop the application using VS2008 |
Deploy a C# Application to your device
- Press the Green play button to deploy and run the program
VS2005 .Net CF 2.0 Update
When deploying a C# application your breakpoints may not be hit.
To fix this, install the .Net CF 2.0 SP2 on your desktop machine
Embedded Silverlight Application (VS2008)
- Run Expression Blend 3.
- A menu will popup, select new project.
- -
- -
- Select a Silverlight for Windows Embedded Application
- -
- -
- Create content and save the Expression Blend project.
- Start VS 2008 and select Tools->Windows Embedded Silverlight Tools->Create Platform Builder Subproject.. menu option.
- -
- -
- Name the application and select a location for the converted subproject and press Next.
- -
- -
- Select the .csproj created originally by the Expression Blend and press Next.
- -
- -
- No errors window should appear, which means your project has been converted successfully.
- -
- -
- Go to the Solution Explorer, right click the Subprojects and select Add Existing Subproject..
- -
- -
- Browse to the converted subproject you set four stages ago, select the sources file and press open.


MFC Application (VS2008)
After installing the SDK, there are a few Microsoft fixes and updates to install:
| Installation must be done in the specified order |
- Windows Embedded Compact 7 Update 3
- Visual Studio 2008 update for Windows Embedded Compact 7
- Windows Embedded Compact 7 ATL Update for Visual Studio 2008 SP1
After installing the above you can write and deploy an MFC Smart Device application.
- Minimize the current instance of Visual Studio/Platform Builder
- Start a new instance of Visual Studio 2008
- – you will use the new instance of Visual Studio 2008 to write and deploy your application.
- Within Visual Studio 2008 select File->New->Project
- Select Project type: Visual C++ | Smart Device

- Change the Project name to MFCApp
- Click OK to create the Smart Device application.
The MFC application wizard requires that you provide information about the application you want to build, this includes the platform you want to build for, whether the application is Doc/View based etc…

| The default settings are to build an application for Windows Mobile 5.0 Pocket PC as a single document interface (SDI) application |
- Select the Platforms option on the left side of the wizard or press Next
- - The Platforms page of the wizard allows you to select which platform (SDK) the application will be built against
- – The default option is to build for Windows Mobile 5.0 Pocket PC, you will need to remove Windows Mobile 5.0 Pocket PC and add the SDK you installed in the first step

- Select Windows Mobile 5.0 Pocket PC in the list of Selected SDKs
- Click the
 button to move Windows Mobile 5.0 Pocket PC out of the Selected SDKs list
 - Select the desired SDK from the list of Installed SDKs
- Click the
 button to move the CM_T35_WEC7 into the selected SDKs list

Now that the Platform has been configured you can review/set some of the application specific options:
- Click on Application Type on the left side of the dialog.
The default option for an MFC application is to build a single document interface (Multiple Document Interface applications [MDI] are not supported on CE based devices).
- Change use of MFC from Use MFC in a Static Library to Use MFC in a Shared DLL
Feel free to explore some of the other wizard settings for the MFC application, at this point you have configured the basic options for the application.
- Click Finish to allow the MFC application source to be generated